Over the years I've noticed that most people are comfortable making a quickbread but as soon as yeast gets involved people start wussing out. So I'm writing this post for you guys, so you don't have to be scared of the yeast any more. Yeast is our friend. Yeast makes bubbly bread and bubbly beer.
It goes by many names - baker's yeast, brewer's yeast, ale yeast, budding yeast, and its scientific name Saccharomyces cerevisiae. This particular type of yeast has been used for thousands of years in our food, with the first evidence of usage dating back to the ancient Egyptians. A related strain of wild yeast Saccharomyces exiguus (also known as S. minor) is used to make sourdough breads. (Don't get 'em confused for Candida albicans, which is another type of yeast that is NOT our friend.) Yeast basically eats fermentable sugars and turns them into carbon dioxide and alcohols. The carbon dioxide is what puts the bubbles in our bread and beers. In this post I'm going to go through how to properly use baker's yeast, how to make your own "ginger bug" for brewing ginger beer and making ginger soda, and how to make your own sourdough starter. Why those particular things you ask? Because that's what I'm making right now.
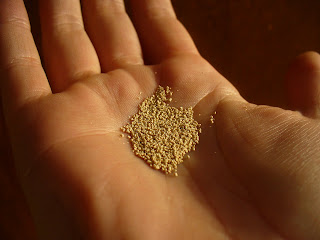
S. cerevisiae cells are round, 5–10 micrometers in diameter (cute little buggers). Yeast from the store will come in either packets or jars of a dry brown powder that consists of tiny balls of live yeast cells coated in dry dead yeast cells and a growth medium - this form of yeast is called active dry yeast (other varieties available are cream yeast, instant yeast, rapid-rise yeast and compressed yeast. Don't buy these unless your recipe specifically calls for that kind). Active dry yeast needs to be rehydrated before you can use it. Proper rehydration of the yeast cells is vital for fermentation.
When rehydrating your dry yeast make sure you use clean ph balanced (filtered) water (never distilled, the yeast need those minerals). The water must be warm but not hot! Between 99-105°F (this is very important!) Hotter water will kill your yeast and water below 60 degrees can reduce your yeast's viability by more than half. Allow your yeast to come to room temperature if you have been storing them in the refrigerator. Add your yeast to the warm water and it in (the dry yeast has a tendency to stick to itself and form clumps if you don't stir it up a bit). Some recipes will tell you to add salt or sugar to this mixture. Don't do it! Salt and sugar both inhibit yeast growth and slow things down. Your active dry yeast has food in it already for your yeast to start with. In about 5 to 10 minutes your yeast/water mixture should be noticeably bubbling, this might take up to a half hour. At this point you can add it into your other ingredients to make a bread dough. Your dough should be the right temperature for yeast growth. Warmer dough will cause more rapid growth, but yeast start to die at 120 degrees so be careful. 85-95 degrees is normally ideal for making bread. To cold with also kill your yeast. Add your salt and sugar in with the other dry ingredients.

You don't always need to buy yeast to cook with yeast. Its kind of hanging out around us all the time. If you leave something out for it to eat, it will show up. This is the principle behind making a ginger bug or sourdough starter - if you give it the kind of food it likes it will come. I learned how to make these two things from an awesome book called Nourishing Traditions by Sally Fallon. It's my roommates book but I have fallen in love with it. Making your "ginger bug" is way easy. Get a clean jar and put 1.5 cups of filtered water in it. Add 2 tsps of ground ginger and 2 tsp of sugar to the water and shake well. Cover and leave at room temperature for 24 hours. Every 24 hours for 7 days add 2 more tsps of ginger and 2 more of sugar. By day 7 it should start bubbling. If it doesn't, throw it away and try again.
To make sourdough starter all you need is rye flour and water, and 7 more days. Start with 2 cups of cold filtered water and 2 cups of rye flour. Mix them together until nice and soupy in a gallon sized bowl. Cover with cheesecloth and let it sit in a warm place. Everyday, transfer the mixture to a clean bowl and add one cup of rye flour and enough water to keep it soupy. After a few days it should start to bubble and develop a wine-like aroma. This bubbly frothy stage should subside. After 7 days you should have about 3 quarts of sourdough starter. Leftover sourdough starter can be stored in airtight containers in the fridge or freezer. We are going to make sourdough bread and short beer with our starter. It goes by many names - baker's yeast, brewer's yeast, ale yeast, budding yeast, and its scientific name Saccharomyces cerevisiae. This particular type of yeast has been used for thousands of years in our food, with the first evidence of usage dating back to the ancient Egyptians. A related strain of wild yeast Saccharomyces exiguus (also known as S. minor) is used to make sourdough breads. (Don't get 'em confused for Candida albicans, which is another type of yeast that is NOT our friend.) Yeast basically eats fermentable sugars and turns them into carbon dioxide and alcohols. The carbon dioxide is what puts the bubbles in our bread and beers. In this post I'm going to go through how to properly use baker's yeast, how to make your own "ginger bug" for brewing ginger beer and making ginger soda, and how to make your own sourdough starter. Why those particular things you ask? Because that's what I'm making right now.
S. cerevisiae cells are round, 5–10 micrometers in diameter (cute little buggers). Yeast from the store will come in either packets or jars of a dry brown powder that consists of tiny balls of live yeast cells coated in dry dead yeast cells and a growth medium - this form of yeast is called active dry yeast (other varieties available are cream yeast, instant yeast, rapid-rise yeast and compressed yeast. Don't buy these unless your recipe specifically calls for that kind). Active dry yeast needs to be rehydrated before you can use it. Proper rehydration of the yeast cells is vital for fermentation.

When rehydrating your dry yeast make sure you use clean ph balanced (filtered) water (never distilled, the yeast need those minerals). The water must be warm but not hot! Between 99-105°F (this is very important!) Hotter water will kill your yeast and water below 60 degrees can reduce your yeast's viability by more than half. Allow your yeast to come to room temperature if you have been storing them in the refrigerator. Add your yeast to the warm water and it in (the dry yeast has a tendency to stick to itself and form clumps if you don't stir it up a bit). Some recipes will tell you to add salt or sugar to this mixture. Don't do it! Salt and sugar both inhibit yeast growth and slow things down. Your active dry yeast has food in it already for your yeast to start with. In about 5 to 10 minutes your yeast/water mixture should be noticeably bubbling, this might take up to a half hour. At this point you can add it into your other ingredients to make a bread dough. Your dough should be the right temperature for yeast growth. Warmer dough will cause more rapid growth, but yeast start to die at 120 degrees so be careful. 85-95 degrees is normally ideal for making bread. To cold with also kill your yeast. Add your salt and sugar in with the other dry ingredients.

Ginger Bug!
You don't always need to buy yeast to cook with yeast. Its kind of hanging out around us all the time. If you leave something out for it to eat, it will show up. This is the principle behind making a ginger bug or sourdough starter - if you give it the kind of food it likes it will come. I learned how to make these two things from an awesome book called Nourishing Traditions by Sally Fallon. It's my roommates book but I have fallen in love with it. Making your "ginger bug" is way easy. Get a clean jar and put 1.5 cups of filtered water in it. Add 2 tsps of ground ginger and 2 tsp of sugar to the water and shake well. Cover and leave at room temperature for 24 hours. Every 24 hours for 7 days add 2 more tsps of ginger and 2 more of sugar. By day 7 it should start bubbling. If it doesn't, throw it away and try again.
Once my bugs and starters are all ready I will do another post with recipes for sourdough bread and ginger beer. :)


