Thursday, March 17, 2011

Irish Beer Bread

Don't be like me - wait until the bread cools to slice it!


For St. Patty's day I considered doing something more fancy, perhaps those chocolate Guinness cupcakes that everyone is so fond of. I decided there are probably enough of those on the internet already, and also enough chocolate in my house from No-Bake Monday's fudge that I could do without cupcakes. Instead I turned to a classic recipe from the Irish side of my family, straight out of Grandma Robinson's cook book (although it's in my Mom's handwriting so it may be more fairly attributed to her). I make this bread all the time because it is so good and the boyfriend loves it. He's even willing to give up a beer for it. Also, because the beer and baking powder provide the leavening action (not yeast) you don't have to wait for this bread to rise, which makes the whole baking process much shorter.

Pabst Blue Ribbon Beer - How to Get A Head 11x17 Poster
Ingredients:
- 3 c flour
- 3 3/5 t baking powder
- 1 1/2 t salt
- 1/3 c sugar
- 1 egg
- 1 can (12oz) beer (I used Pabst Blue Ribbon)

My dry ingredients - the brown stuff is raw sugar in case you were wondering

Directions:
- Combine the dry ingredients (flour, baking powder, salt, sugar) in a large mixing bowl and blend together.
- Combine 1 slightly beaten egg and 12 oz of beer, pour into dry ingredients and mix well. The batter may be a little lumpy.
- Pour the batter into a greased loaf pan and bake at 350°F for about an hour.

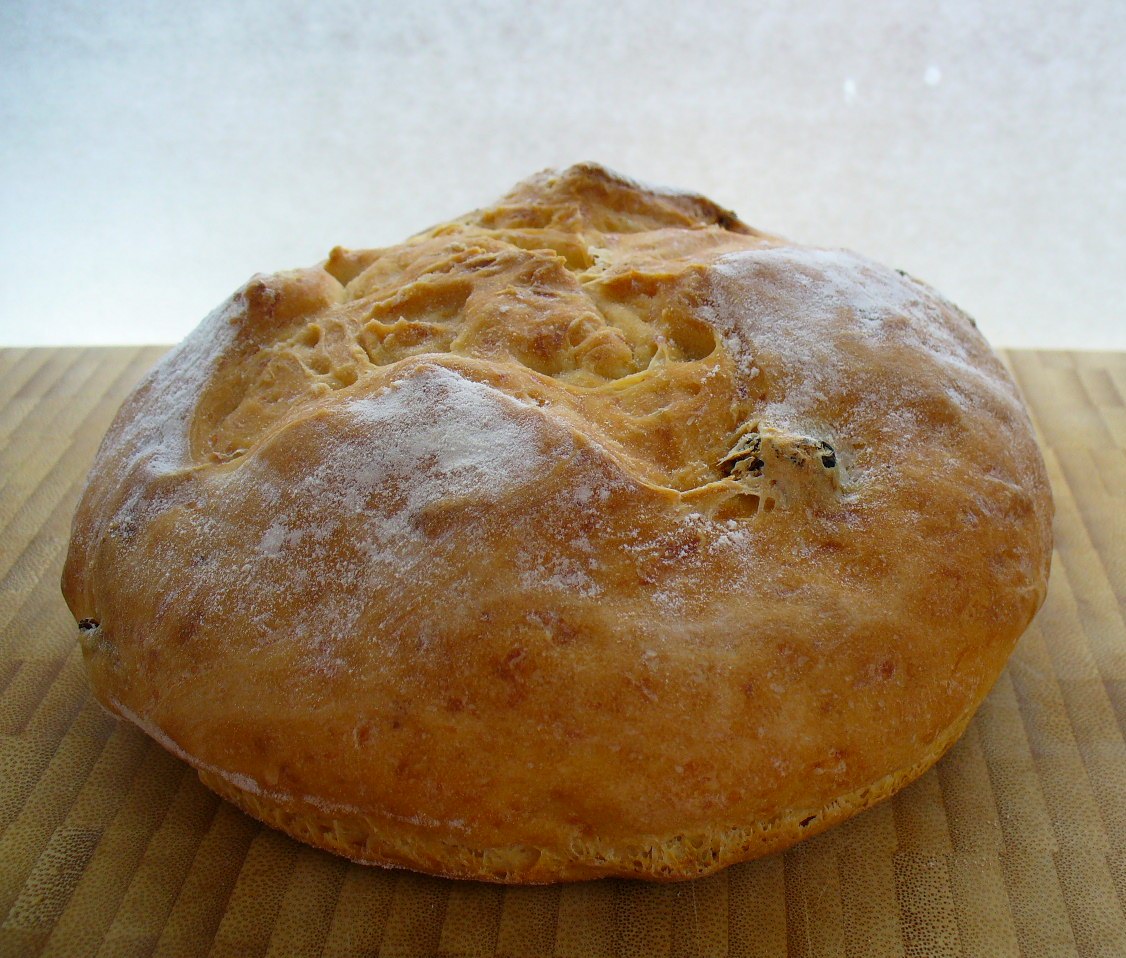
I tried to cut it when it was still hot because I wanted to eat it so bad...


Wow, that was really easy, right?
-

Monday, March 14, 2011

No-Bake Monday: Cayenne and Sea Salt Fudge


Ka-kow! Or should I say, cacao? My friend Lysa from Smile Belly reminded me that fudge is awesome and easy to make. She had a recipe for cinnamon fudge that I adapted for this post. She just looked too cute holding a tray of fudge, and the fudge looked too yummy, and anything I can put sweetened condensed milk in I am down for (see the last no-bake monday recipe).

Ingredients:
- Butter, for greasing the pan
- 1 (14-ounce) can sweetened condensed milk
- 1 teaspoon cayenne pepper
- 1 teaspoon pure vanilla extract
- 1 pound (about 2 cups) bittersweet (60 percent cacao) chocolate chips (recommended: Ghiradelli)
- 3 tablespoons unsalted butter, cut into 1/2-inch pieces, at room temperature
- Kosher or sea salt for sprinkling

Directions:
-Grease your pan and line with parchment paper so the paper hangs over the edges. 8x8 is what Lysa used and I used a 7x14, probably also a 9x9 or any other similarly sized pan would work. The bigger pan you use the thinner your layer of fudge will be.
-Combine your ingredients in a double boiler, or you can use a glass or stainless steel bowl over a pot of just barely simmering water. Sir your ingredients together until the chocolate is totally melted (this will take 5 or 10 minutes, be patient)
-Pour the fudge mixture into your pan and smooth out with a spatula. Sprinkle the top with salt if desired (it's still tasty without it, but I love the chocolate-salt combination). Refrigerate for a few hours until firm.
-When fudge is ready, run a warm knife (put it under hot water) around the edge of the pan to loosen the fudge. Pop the fudge out of the pan onto a cutting board and remove the parchment paper. Cut into squares and serve! Keep the extra in an airtight container in the refrigerator.


What I really like about this fudge is that you don't notice the cayenne flavor at first. It sneaks up on you like it should so you are first hit with slightly salty chocolate flavor, then it's sweet, then it's spicy. Yes!

Friday, March 11, 2011

Salted Oatmeal Cookies


My roommates mother sent a care package full of the best ginger bread cookies I have ever had. If I had the recipe for those cookies that is what I would be talking about right now. But I don't. Alas, those awesome ginger cookies set off the need in me. I had to have more cookies. So, after scouring my kitchen I gathered what supplies I had and decided that oatmeal cookies where what I had the ingredients for. That was such a good plan. These cookies are so freaking good that my boyfriend insisted between bites that I put the recipe up on this blog. Salty and sweet and oatmeal-y.

Ingredients:
- 12 tablespoons (1 1/2 sticks) unsalted butter, at room temperature
- 1 cup light brown sugar*
- 1/2 cup sugar
- 1 teaspoon baking powder
- 1/4 teaspoon baking soda
- 1/4 teaspoon ground cinnamon
- 2 large eggs
- 1 teaspoon vanilla extract
- 1 3/4 cups flour
- 2 cups rolled oats (not quick-cooking)
- Sea salt, for sprinkling

*I didn't have any brown sugar, so I used a cup of raw sugar and about a teaspoon of blackstrap molasses instead. This may have contributed to why these cookies were so sexydelicious.
Check out this Link for a guide on substituting white sugar and molasses for brown sugar. I used less than they recommend because I used blackstrap molasses.

Directions:
1. In the large bowl of a stand mixer fitted with the paddle attachment, beat the butter for a few minutes on medium-high speed until light and fluffy.
2. Scrape down the sides of the bowl and add the sugars, baking powder, baking soda and cinnamon, beating until the mixture is well blended. R
3. Reduce the speed to medium and add the eggs and vanilla extract, mixing until well incorporated.
4. Reduce the speed to low and add the flour and oats, scraping down the sides of the bowl as necessary and mixing just until they are incorporated.
5. Cover the bowl with plastic wrap and chill the dough for at least an hour before baking.
6. Preheat the oven to 375 degrees. Line a large baking sheet with parchment paper.
7. Form the dough into golf ball-size balls (makes 18 cookies, make smaller balls for more cookies) and place about 2 inches apart on the baking sheet. Sprinkle sea salt generously on top of each ball of dough, as you would sugar. Bake 1 sheet at a time for 15 minutes or until the cookies are puffed and beginning to turn golden, being careful not to overbake. (The cookies should have a tender interior.) Transfer the cookies, still on the parchment paper, to a wire rack to cool completely.

I don't have a stand mixer, I'm pretty sure I did all the mixing for this recipe with a fork. You don't really need fancy equipment. I also made my cookies smaller than "golf-ball" sized balls because I didn't want giant cookies at the end. Portion them however you like.


You can keep the cookie dough in the fridge for a few days and make cookies whenever you have the urge...

Thursday, March 10, 2011

Naan Bread


Naan is one of my favorite things, it is the perfect companion for pretty much any Indian dish, and I will eat it with pretty much any food that has a sauce. Why I haven't tried to make my own before is crazy to me. Probably because traditional naan is baked in a clay oven called a tandoor oven that reaches temperatures over 500 degrees. There is a wide variety of recipes on the internet all with varying ingredients and reviews, and after considering and dismissing many recipes I decided to use one that looked good and used a conventional oven from Manjula's Kitchen.

The recipe calls for a baking stone - alas another piece of bakeware I'm not in possession of. I used a cast iron skillet in place of the baking stone and I think it worked almost just as well.

Ingredients:
- 2 cups of All Purpose flour (Plain flour or maida)
- 1 teaspoon active dry yeast
- 1 teaspoon salt
- 1 teaspoon sugar
- Pinch of baking soda
- 2 tablespoons of oil
- 2 1/2 tablespoons yogurt (curd or dahi)
- 3/4 cup lukewarm water

Also Needed:
-Flour for rolling
-Ghee or clarified butter (or butter if you are like me and lazy, but ghee is traditional)

Method:
1. Dissolve active dry yeast in lukewarm water and add the sugar. Let it sit for 10 minutes or until the mixture becomes frothy.
2. Add salt and baking soda to the flour and mix well.
3. Add the oil and yogurt mix, this will become crumbly dough.
4. Add the water/yeast mixture and make into soft dough.Note: after dough rise will become little softer.
5. Knead until the dough is smooth. Cover the dough and keep in a warm place for 3-4 hours. The dough should almost be double in volume. (I didn't leave it for that long, I just waited until it doubled and then went for it)
6. Heat the oven to 500 degrees with pizza stone for at least thirty minutes so stone is hot. Using a pizza stone will help to give naan close to same kind of heat as clay tandoor. (I used my cast iron skilled instead and it worked pretty well)
7. Next turn the oven to high broil.
8. Knead the dough for about two to three minutes and divide the dough into six equal parts.
9. Take each piece of dough, one at a time, and roll into 8-inch oval shape. Dust lightly with dry flour to help with the rolling.
10. Before putting the Naan in oven, lightly wet your hands and take the rolled Naan, and flipp them between your palms and place onto your baking/pizza stone into the oven.
11. You can place about 2 Naan on the baking/pizza stone at a time. The Naan will take about 2 to 3 minutes to cook, depending upon your oven. After the Naan is baked(Naan should be golden brown color on top).
12. Take naan out of the oven and brush lightly with clear butter or ghee.
13. wait 2 to 3 minutes before baking the next batch of naan. It gives oven the chance to get heated again to max.


MMMMMMM....it came out good enough for me. I like my naan soft and spongy so I pulled mine out after about 3 minutes, even though they weren't always browned on top. Also, my oven kind of sucks, so I'm not entirely convinced it was hot enough for that. It was still tasty enough to eat way to many of in one sitting.

If you manage to have any left over, wrap them in tin foil and keep them in the refrigerator. When you want to eat them pop them into the oven again for a few minutes to heat them up.

Tuesday, March 8, 2011

Black Marshmallow Fondant: Badass and Tasty

A few months ago I made marshmallow fondant for the first time. I was also making my first tierd cake. My friends who were getting married have the utmost confidence in my baking skills, despite the fact that I had never done anything remotely like making a wedding cake. God bless them. It was a fairly low key wedding but I had a lot to do (as the only bridesmaid, cake maker, bridesmaid dress maker, and brides makeup artist). The cake was my wedding gift to them and I decided to make them a Star Trek themed cake (yes, we are all nerds) to match the Star Trek themed invitations that the bride's artist father had made. Sadly, I do not have quality photos to show you of this endeavor but I'll slap my crappy snapshots up here so you'll get the idea.


Check that out. Awesome right? I made the topper on there too (out of sculpey, not fondant. I cheated a little).

Naturally, the first time I make fondant I decide I want it in the two hardest colors to get right, red and black. The red involved dumping nearly two jars of Wilton food coloring in with the marshmallow fondant and then some more until it finally wasn't pink. Grey fondant wasn't going to fly, so I had to try something even more intense for the black parts. Here's how you do it:

Marshmallow fondant is fondants tastier and easier to make cousin. Your basic marshmallow fondant recipe involves a bag of mini-marshmallows, a little bit of water, and powdered sugar. You dump the marshmallows in a bowl with a tiny bit of water and throw it in the microwave for 30 second intervals, stirring in between rounds until the marshmallows are melty and gooey. Then you stir in powdered sugar until you get the consistency you want. Easy enough. Black fondant requires going a step further and adding another special ingredient: chocolate chips.


Black Marshmallow Fondant
:
- 6 oz. of semi sweet chocolate chips (white for light colors, milk choc. for dark) (about half of a bag)
- 1 16 oz. bag of mini marshmallows
- 3 tbsp. of clear Karo syrup
- 3 tbsp. water
- 1 1lb. bag of powdered sugar + 1-2 Cups
- gel black (or other dark) food coloring and paste
- Crisco

1. Dump your marshmallows in a microwave safe bowl and add the water then microwave for 30 second intervals, stirring between intervals until the marshmallows are melted (approx. 2 minutes)
2. Add the chocolate chips and stir until the chips are melted. Pop back in the microwave if you need to.
3. Add the karo syrup and stir in with a butter knife. The syrup is not used in regular marshmallow fondant, it appears in this recipe to keep the chocolate from hardening to much to use.
4. Add 1-2 tspns of black gel color (as much as needed to get your mixture good and black) and mix it in.
5. Add about half of your powdered sugar and stir. Your mixture will start thickening and becoming doughy and look like this:
Keep stirring! It will become black again!
6. Add the rest of the powdered sugar to the bowl. Grease your hands and the counter liberally with the crisco and kneed in the rest of the powdered sugar. At the end you should get this:

To store your fondant coat it with a layer of crisco, wrap it in plastic wrap and keep it in an airtight container in the refrigerator. When you are ready to work with the black fondant you may need to pop it in the microwave for a few seconds to soften it up. Regular marshmallow fondant can be warmed up enough to use in your hands, but the chocolate gets much stiffer and sometimes needs a little help.

And that, ladies and gentleman, is the most badass baking I have ever done. Also, marshmallow fondant is pretty tasty so don't be surprised if people (especially kids) eat it instead of peeling it off the cake (like most do with regular fondant).

Monday, March 7, 2011

Sundried Tomato Cheddar Bread


I adapted this recipe from Peter Ryan's Roasted Tomato Cheddar Bread. It has tomatoes, it has cheese- how could you not want it? Next time I have tomatoes I will definitely make it with roasted tomatoes instead of the sun-dried tomatoes. The sundried give a nice sweet flavor but I'm sure the roasted tomatoes would give a much richer, tomato flavor. I fudged a few other things on this recipe - I don't have a baking stone, and my crappy oven gave up halfway through baking and got down to 250 degrees before I noticed and turned it on again. I am also pretty sure I did not add enough cheese. But it still came out beautiful and tasty.


I halved Peter's recipe to make 2 1lb loaves.

Sundried Tomato Cheddar Bread
1.5 c lukewarm water
3/4 Tbsp yeast
3/4 Tbsp salt
3/4Tbsp sugar
3.5 c flour (unbleached all-purpose)
1 cup shredded cheddar cheese (I used Tillamook smoked extra-sharp)
about 10 slices sundried tomato (or more to taste) – see recipe below

1. mix the yeast, salt, and sugar with the water in a large bowl (or the bowl of a stand mixer). mix in the dry ingredients and the cheese without kneading, using a spoon or stand mixer. I would say that the amount of cheese and tomato you use can be varied according to your taste. I would have liked mine to be cheesier, so next time I plan on adding another half cup of cheese cut into cubes so there will be nice cheesy bits in the bread. Cover, not airtight, and allow to rest at room temperature until the dough rises and collapses (or flattens on top), approximately 2 hours.

* the dough can be used immediately after the initial rise, though it is easier to handle when cold. refrigerate in a lidded, but not airtight, container and use over the next 7 days.*

2. On baking day, dust the surface of the dough with flour and cut off a 1 pound (grapefruit-sized) piece. dust the piece with more flour and quickly shape it into a ball by stretching the surface of the dough around to the bottom on all four sides, rotating the ball a quarter-turn as you go. allow to rest and rise on a cornmeal-covered pizza peel for 1 hour.

3. twenty minutes before baking time, preheat the oven to 450F, with a baking stone (or unglazed quarry tiles) on the lowest rack. place an empty broiler tray on any other shelf that won’t interfere with the rising bread. sprinkle the loaf liberally with flour and slash across the top, using a serrated bread knife. leave the flour in place for baking; tap some of it off before eating.

4. slide the loaf directly on the hot stone. pour 1 cup of hot tap water into the broiler tray, and quickly close the oven door. bake for about 25 minutes, or until deeply browned and firm. small or larger loaves may require adjustments in baking time. allow loaves to cool before slicing and eating.


I will have to try this recipe again with more cheese and roasted tomatoes (and an oven that works properly.) My favorite way to eat this bread is with MORE cheese on top. Like I said, I wanted it it cheesier.

No-Bake Monday: Coffee Jello


So, I don't like coffee and my two roomies can't drink coffee because of stomach problems. So we are generally a tea-drinking household. However, when I saw this recipe on Food Librarian's wonderful blog I was struck by the overwhelming desire to consume coffee in gelatinous form.

While it may sound gross at first, let me assure you that the can of sweetened condensed milk that goes into this ensures creamy, sweet coffee deliciousness. The fact that it is almost as easy to make as jello is an added bonus. These squares are an awesome little caffeinated pick-me-up (just don't eat to many before bed time).

Coffee Gello
1/2 c cold water
2 cups strong coffee, hot. The stronger you make the coffee, the more caffeine and coffee flavor you will get in the end.
1 can (14 oz) sweetened condensed milk (not evaporated milk)
3 packages of Knox unflavored gelatin

1. Place 1/2 c cold water in a bowl big enough to combine all ingredients in.
2. Sprinkle 3 unflavored gelatin packets over the water. Let sit until the gelatin blooms, about 10 minutes. (mine didn't take anywhere close to that long)
3. Stir in the hot coffee and mix until the gelatin is completely dissolved. (It will be chunky at first, give it time, just keep stirring)
4. Stir in the can of sweetened condensed milk.
5. Pour into glass pan. Thickness of finished jello depends on the size of the pan. I used a 7 x 11 pan but a 9 x 13 pan will give you thinner pieces and an 8 x 8 pan will give you thicker pieces. (I used a metal pan and it worked out fine)

Note: The combo of coffee and sweetened condensed milk is inspired by Vietnamese coffee. You can probably adapt this to use coffee or espresso, cream and sugar (be sure to dissolve the sugar in the hot coffee and gelatin). I find that 1 packet of unflavored gelatin will firm up 1 1/2 cups of liquid to finger jello "strength" (according to David Lebovitz's "How to Use Gelatin" post you can mold 2 cups with one envelope - but I feel finger jello needs to be stronger).

Sunday, March 6, 2011

Rosemary Bread


MMMMM rosemary bread. I chose this recipe because I was looking for one that didn't involve wheat flour. Not that I have anything against wheat flour, I just didn't have any and wanted to make rosemary bread. This recipe came out great! The bread developed a beautiful crunchy crust and the rosemary flavor was awesome. You could use whatever herb you wanted in this bread instead of rosemary. Be creative with what you add in!

Rosemary Bread Recipe

Ingredients:
1 teaspoons dried yeast
3/4 pint (425ml)hand hot milk and water mixed half and half
1 tspn white sugar
1 1/2lb (750g) strong white flour
1 tspn salt
1 tablespoon olive oil
small handful of fresh rosemary
extra flour for kneading

Instructions:
Pour 1/4 pint of the milk and water into a bowl. Stir in the sugar and then the yeast. Whisk it together so that the yeast dissolves.

Set it to one side to froth - takes around 5 minutes.

Sift the flour and salt into a bowl. Stir in the rosemary (or herb of your choice).

Make a well in the centre of the flour and pour in the yeast mixture.

Pour in the rest of the milk and water and the oil.

Start mixing with a wooden spoon and then use your hands to mix to finish off.

Lightly flour the work surface or a board. Turn the dough out and knead for about 10 minutes. It should develop a shine and be springy and elastic.

Leave it covered for between an hour and 2 hours (depends on the temperature) until it's doubled in size. In colder temperatures it will take longer to rise.

Knock the air out and knead again for 5 minutes.

Divide the dough into half and make each a round - place on an oiled baking sheet and brush oil over.

Slash the top with a knife.

Sprinkle with a little crushed sea salt.

Leave to prove for 30 minutes to an hour until they double in size again.

Pre-heat the oven to Mark 8, 450F, 230C and bake for about 35 to 40 minutes -

They should sound hollow when you tap the bottoms.


Thanks go out to http://www.the-herb-guide.com/ for this one.Artisan Bread in Five Minutes a Day: The Discovery That Revolutionizes Home Baking